
Lidia Commerce Documentation
The Media Management section allows you, as a seller, to manage all visual and document assets used in your product, category, and brand processes from a single centralized area. Through this section, you can easily upload, classify, filter, and correctly associate media assets with your products, ensuring content consistency across your listings.
Media Management provides quick access to the visuals and documents you need during product listing and update processes, eliminating the need to upload the same media assets repeatedly and simplifying your operational workflows. As a result, your products are presented in a more organized, standardized, and high-quality manner within the marketplace.
When necessary, as part of marketplace operations, Marketplace admins may provide media upload support on behalf of the seller. This supportive structure helps ensure that seller-focused media management processes continue without interruption.
Image Management is the main area where all visuals in the system are centrally collected and managed. This structure offers a folder-based organization that operates similarly to a file explorer on a computer. Grouping images through folders facilitates product-, category-, and brand-based media management and provides quick and organized access to content.
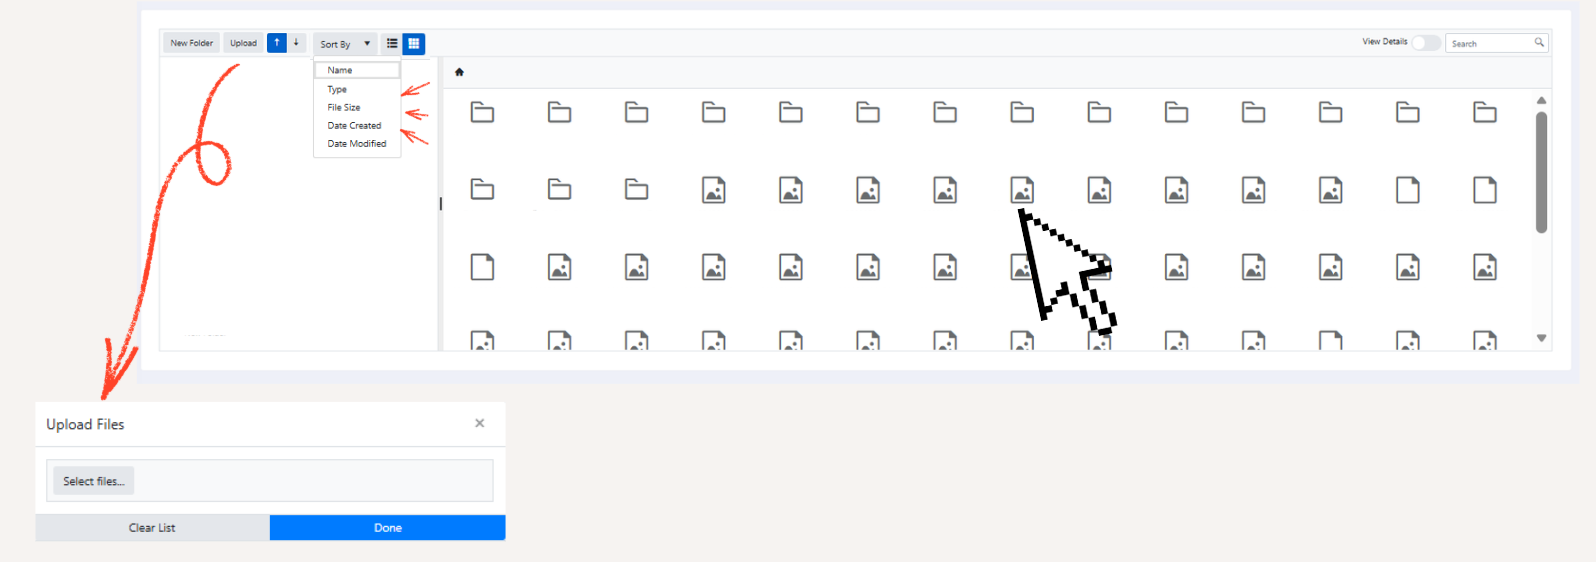
Through this section, sellers can manage the images used in product listing and update processes from a single central location, preventing repetitive upload operations and simplifying operational workflows. The folder structure provides order and control in content management, especially for sellers with a high volume of visual assets.
You can upload content in the following formats to this area:
.jpg, .jpeg, .png, .gif, .bmp, .jfif, .webp, .rar, .zip
Uploaded files can be filtered by file name, file type, file size, upload date, and last modified date. This advanced filtering structure offers a fast and efficient management experience for sellers with extensive media content.
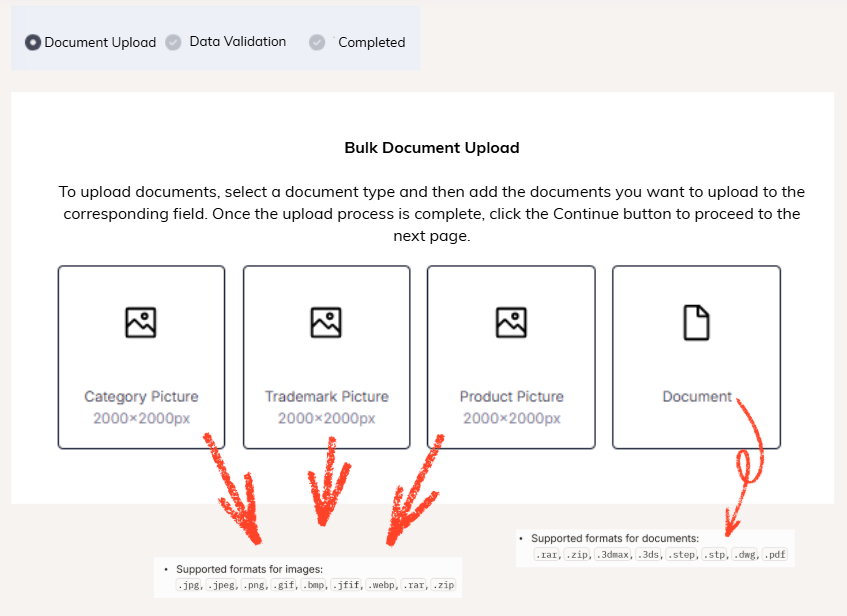
The Bulk Media Upload area is a management section that allows multiple images or documents to be uploaded in a single operation. The upload process consists of the following steps:
Document Upload → Data Validation → Completed
With this structure, category, brand, and product images as well as document files can be added to the system quickly and securely, in compliance with predefined standards.
There are four main template types available on the upload screen:
At this stage, the Show Invalid Rows Only button simplifies the editing process for sellers by listing only the erroneous files.
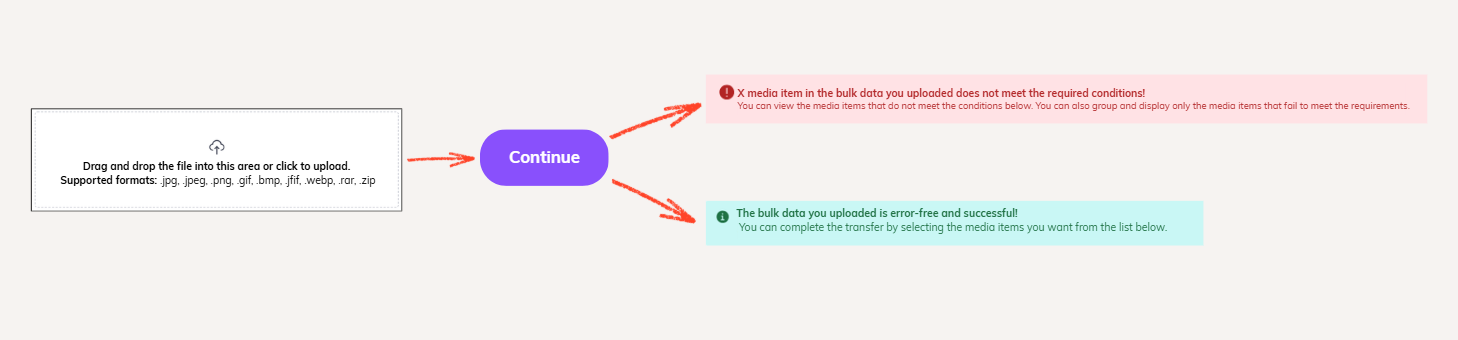
Image Codes and Product Association
The file name assigned to each image during bulk or individual upload is considered the image code in the system. This code is used to associate images with products.
The product–image matching process works as follows:
This structure eliminates the need to manually select images one by one during product upload, speeds up the process, and prevents incorrect associations.