
Lidia Commerce Documentation
In this guide, you will learn how to define product properties and options, understand the difference between them, and add them to a data schema.
Properties and options determine which information is included on the product card and how that information is managed in the system.
When configured correctly, product data becomes more consistent and variant management can be handled in a more controlled way.
 What Is a Property?
A property is a data field used to define the technical or descriptive characteristics of a product.
Properties create the information shown on the product card and help products be filtered, compared, and described in more detail.
Properties do not create price or stock differences. They describe the characteristics of the product.
What Is a Property Data Type?
After a property is created, you define the format of the data that the property can accept. This is called the data type.
Supported property data types include:
When Single Select or Multi Select is used, the available values must be defined in advance.
Property: Energy Class
Data Type: Multi Select
Defined Values: A, B, C, D, E, F
During product creation, the user can select only from the values you have defined. New values cannot be entered manually.
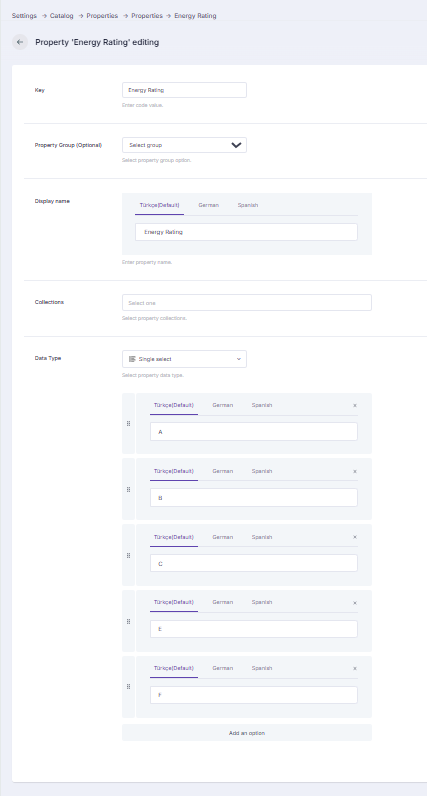
This approach keeps data entry under control and helps you maintain a consistent product structure.
What Is a Property Group?
A property group is used to organize similar properties under the same heading. It helps PIM users manage product data in a more structured way.

For a television product, properties such as Screen Size, Resolution, and Panel Technology can be grouped under a property group named Display Properties.
This keeps related information together and creates a more organized structure on the product card.
What Is an Option?
An option is a field used to create different versions of a product.
Information that creates differences in price or stock is generally defined as an option.
For a television product, Resolution can be defined as an option. Values such as 4K and 8K can then create different versions of the product.
What Is an Option Value?
An option value represents one of the available values that belongs to an option. After creating an option, you can add as many option values as needed.

If Resolution is a television option, its option values may be:
Another example is the Color option. Its values may include:
Option values can be defined entirely according to your business needs.
What Is an Option Value Group?
An option value group is used to organize similar option values together. It is especially useful when an option contains a large number of values.
For the Color option, values such as Gray, Silver, Anthracite, White, and Black may be defined.
Similar values such as Gray + Silver + Anthracite can be grouped under an option value group named Gray Tones.
Click Add Option Value Group.
Save the group.

Open the detail page of the related option value and associate it with the option value group you created.
What Is an Option Group?
An option group is used to organize multiple options under the same logical heading. This structure is especially useful for products with many different options.
For a television product, Color, Panel Technology, and Resolution can be grouped under an option group named Display Properties.
Navigate to the Option Groups area under Catalog settings.
Click Add Option Group.
Save the group.
Open the detail page of the related option and select the group from the Option Group field.
What Is the Difference Between a Property and an Option?
A property describes a technical or descriptive characteristic of a product.
It defines the product but does not normally create a price or stock difference.
An option is used to create different versions of a product.
It is generally used for information that may create a price or stock difference.
If the field creates a different version of the product, define it as an option. If it only describes product information, define it as a property.
For a television product, information such as Energy Class, Warranty Period, or Model Year is generally defined as a property.
Fields such as Screen Size, Color, or Resolution are generally defined as options because different values may create different versions of the product.
This distinction depends on your product modeling approach. In Lidia PIM, you can decide which fields should be properties and which should be options according to your business requirements.
How to Create a Property?
Click Add Property.
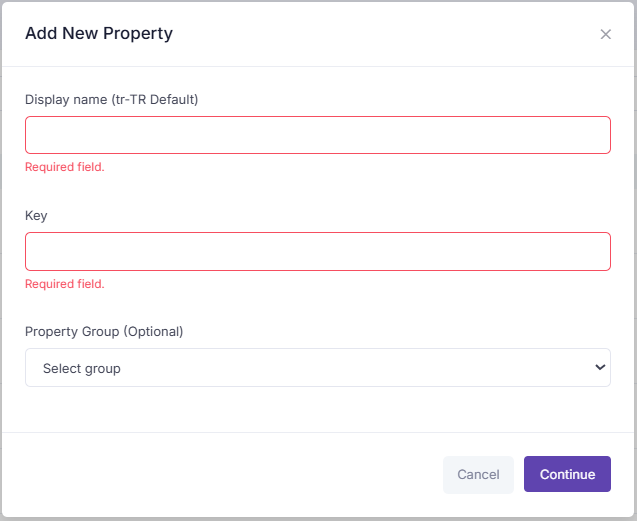
In the opened window:
Click Continue.
The property is created and you are redirected to its detail page.
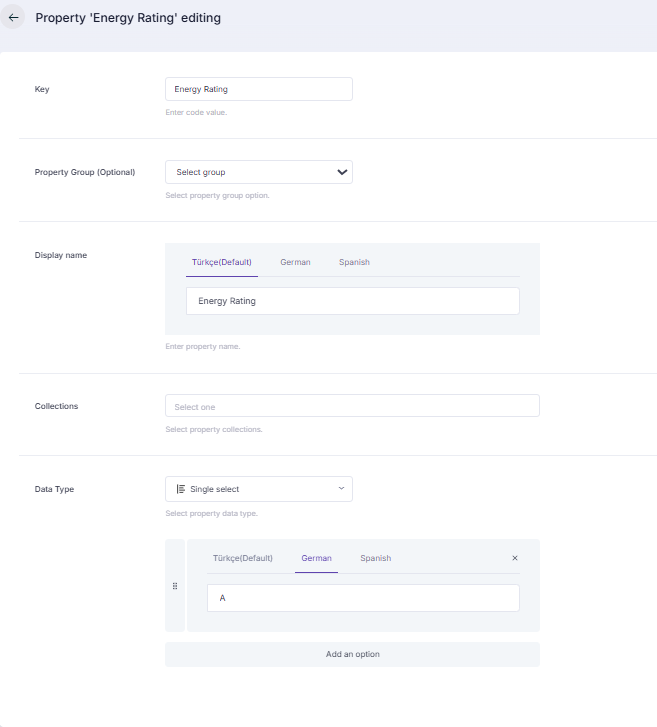
Save your changes.
You can now use the property in your product data schemas.
How to Create an Option?
Click Add Option.
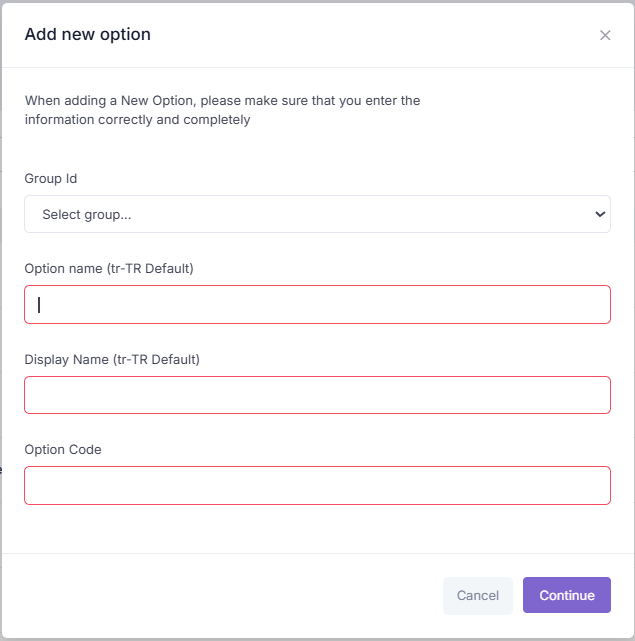
In the Add New Option window:
Click Continue.
The option is created and you are redirected to its detail page.
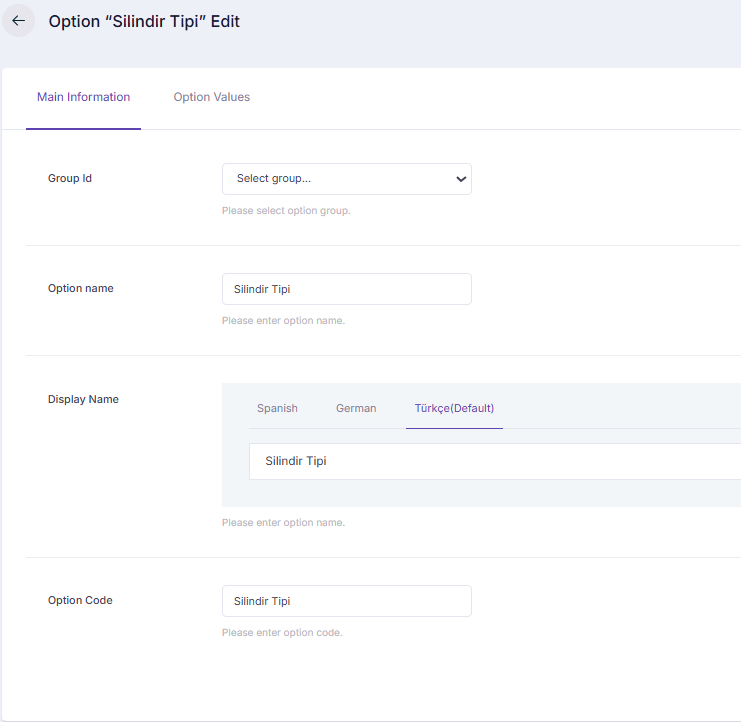
Go to the Option Values tab.
Click Add Value.
In the opened window:
Click Continue.
The option and its values are now ready to be used.
Example Scenario: Television
Let’s create both properties and options for a television product model.
First, define the fields that describe the technical information of the television and generally do not create variants.
Go to Settings > Catalog > Properties and click Add Property.
Property Name: Energy Class
Property Code: ENR-1
Click Continue. After the property is created, select Multi Select as the data type and add the following values:
You can now connect the property to a data schema.
Go to Settings > Catalog > Properties and click Add Property.
In the opened window, enter:
Property Name: Warranty Period (Months)
Property Code: GRNT
Click Continue.
After the property is created, you are redirected to its detail page. Select Integer as the data type.
You can now connect the property to a data schema.
Go to Settings > Catalog > Properties and click Add Property.
In the opened window, enter:
Property Name: Model Year
Property Code: MDL
Click Continue.
After the property is created, you are redirected to its detail page. Select Integer as the data type.
You can now connect the property to a data schema.
Go to Settings > Catalog > Properties and click Add Property.
In the opened window, enter:
Property Name: Built-in Satellite Receiver
Property Code: dahili_uydu_alici
Click Continue.
After the property is created, you are redirected to its detail page. Select Yes / No as the data type.
You can now connect the property to a data schema.
Next, define the fields that can create different versions of the television and may affect price or stock.
Go to Settings > Catalog > Options > Options and click Add Option.
Option Name: Screen Size (inch)
Display Name: Screen Size (inch)
Option Code: ekrn12
Click Continue. After the option is created, go to the Option Values tab and click Add Value.
Create the following option values:
You can now connect the option and its values to a data schema.
Go to Settings > Catalog > Options > Options and click Add Option.
In the opened window, enter:
Option Name: Resolution
Display Name: Resolution
Option Code: CZNRLK
Click Continue.
After the option is created, go to the Option Values tab and click Add Value.
In the New Value window, enter:
Value Name: 4K
Display Value Name: 4K
Value Code: 4K
Create the following values:
You can now connect the option to a data schema.
Go to Settings > Catalog > Options > Options and click Add Option.
In the opened window, enter:
Option Name: Panel Technology
Display Name: Panel Technology
Option Code: PNL-TKNLJ
Click Continue.
After the option is created, go to the Option Values tab and click Add Value.
In the New Value window, enter:
Value Name: LED
Display Value Name: LED
Value Code: LED
Create the following values:
You can now connect the option to a data schema.
Go to Settings > Catalog > Options > Options and click Add Option.
In the opened window, enter:
Option Name: Color
Display Name: Color
Option Code: RENK
Click Continue.
After the option is created, go to the Option Values tab and click Add Value.
In the New Value window, enter:
Value Name: Black
Display Value Name: Black
Value Code: SYH
Create the following values:
You can now connect the option to a data schema.
How to Add Properties and Options to a Data Schema?
After creating properties and options, add them to the data schema so they can be used in your product data model.
Open the data schema where you want to add the properties and options.
Go to the Data Schema Fields tab.
From the Field Library, select the fields you want to include in your data schema. You can select multiple fields at once, such as Category, Brand, Options, Properties, and References.
Click Add Selected to add the selected fields to the Data Schema Fields section.
Click Save after adding the required fields to the data schema.
The selected fields are now part of the data schema and can be used during product creation and management.
You can now connect the data schema to a category and continue with pool creation.
From the Field Library, select and add the following properties:
Then select and add the following options:
After clicking Add Selected, these fields are added to the Data Schema Fields section and become part of the television product model.